There is a way to use the new Facebook photo strip and photo viewer to maximise the engagement of your fans on your Facebook Fan page. You can effectively use them as free adverts for whatever you might want to send your fans to look at off Facebook.
We’ll look at how in a moment.The recent update to the Facebook Fan Pages has given a vast overall improvement to the scope of your music promotion and music marketing efforts on Facebook.
Admittedly, some of the things that many people had learned how to do, such as ‘Welcome’ or ‘Landing’ pages, are going to require more technical ability with the introduction of iFrames. But, provided that you can master the learning curve to do it yourself, or find a tech-savvy friend to help you, the scope of what you can now do to promote music on Facebook has massively increased.
Of course, the companies that currently offer tools for developing your Facebook Fan page without any programming skills will all be offering solutions that will suit most musicians needs.
We’ll look at the options for dealing with the iFrame issue soon, but the first thing you need to do with your new style Facebook Fan page is familiarise yourself with the layout and make use of the obvious changes.
Facebook Profile Picture
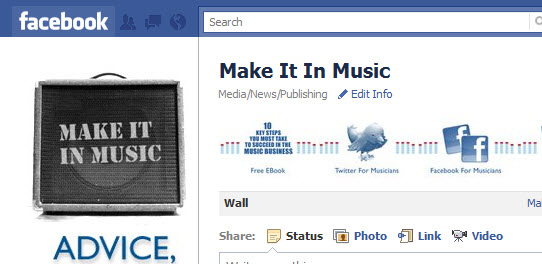
As you’ll no doubt be aware, the new layout has moved the old tabs from the top of the page to the left side and replaced them with a row of five photos.The main profile picture has been slightly altered so that the maximum size is now 180 pixels wide by 540 pixels tall (180px by 540px).
Clearly, if you were using a smaller picture or had a larger vertical picture in the old profile the first thing that you want to do is change that as soon as you have upgraded to the new layout.
Using the new dimensions, create a new image that has some branding connection to the look and feel of your band website and other social networking profiles.
Make sure to remember that you will later have to pick an area of this image to appear as your Fan Page profile ‘thumbnail’ picture all over Facebook (and now all over the internet, in comments on other sites). Facebook needs to edit a part of your new larger image down to a 90px by 90px square for that purpose, so make a part of the larger image ready to look good when cut down.
Once you have a picture in those dimensions, go to ‘Photos’ on the left side of the page, click on profile pictures and ‘Change Profile Picture’.
This will allow you to browse to your computer and upload the photo. Once it’s uploaded, just remember to ‘edit thumbnail’ by clicking the blue link on the picture itself in the upload area to set the smaller area of the image that will serve as the thumbnail.
Facebook Photo Strip
Once you’ve done that, you can turn your attention to the new photo strip and using them as ads for your music.The 5 photo strip was introduced on personal profiles a while ago and some people got very creative, cutting up images to make strips of 5 photos across that were panoramic shots or part of a larger image. You can find examples here.
Well, you can’t quite do the same thing on your Fan Page because you can’t control where each of the images that are in that strip will go – they are random. They can’t be ordered like they can on personal profiles. Every time the page is refreshed, or for each visitor, the order of the photos on the strip is different.
The photos in the strip will automatically be the 5 photos that you have most recently uploaded to your page – either into the ‘Photo’ section where you may have placed them in an album, or if you have posted them to your Wall through the ‘Share’ status bar.
Photos uploaded by your fans will not appear in the photo strip and you can ‘hide’ any image that you have uploaded that you don’t want to appear in the strip by clicking the ‘x’ in the top right corner that appears if you place your mouse on the picture as it appears in the strip.
Now, using the photo strip as we suggest, you will want to only allow the pictures that you upload specifically to be in that strip to appear there. Just be aware then, when you upload anything else, that it will disrupt this strip and you’ll need to ‘hide’ them.
Using the Facebook Photo Strip as adverts
So, you’ll want to create 5 images (or more as they will randomly rotate in the strip) that will sit in the photo strip and act as adverts for stuff that you want your fans to check out.As a band, this might be albums to buy, gig tickets or a video you want fans to watch. For us, and we’ll show you how we do it, we want to draw people’s attention to parts of our main site (as you might want to) and get them to download our free eBook.
We’ve also tried to do a very simple design that connects across all 5 images no matter where in the strip order they come up.
Facebook now allows all images to be viewed in their new photo viewer. Therefore, you want the images that you use for the photo strip to open up large if clicked on. When they are displayed in the photo strip the images are each 97 pixels wide by 68 pixels tall (97px by 68px).
But, if you upload them at that size they will appear the same size – i.e. tiny – in the photo viewer.
Most people have been recommending that you simply make your images 970 pixels wide by 680 pixels tall (970px by 680px), and this is fine, to a degree! It’s the same ratio, just 10 times bigger.
The problem is that Facebook then shrinks the images to fit in the photo strip, but it doesn’t centralise the image – just to be difficult.
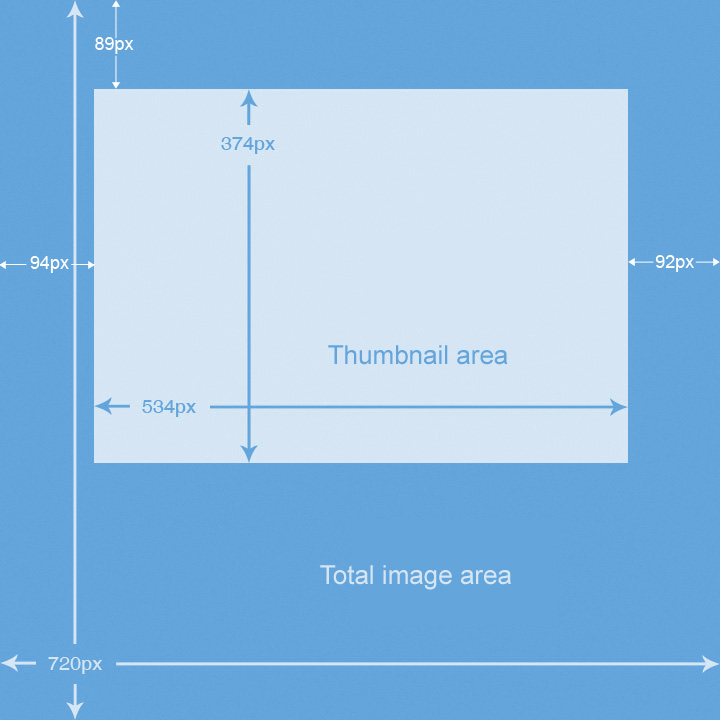
For best results, we recommend making the image 720 pixels wide by 720 pixels tall (720px by 720px) with the image that you want to appear in the thumbnail sitting in an area 534 pixels wide by 374 pixels tall (534px by 374 px) offset as we’ve set out in the layout image on the right.
The measurements of the ‘Thumbnail area’ are in the same 97/68 ratio that Facebook shrinks to, and the location of it is a little bit of guesswork – let us know if you think we’re a few pixels off, but it’s working for us.
The main reason for going for these dimensions is that it’s easier to format a square and a lot of images that musicians will want to use will be squares – such as album covers. You can, of course, go bigger or stick to the 97/68 ratio for the whole image but you’ll need to figure out where the thumbnail area needs to go!
Now you’ve got your photo strip images, you need to upload them and turn them into ads.
Uploading is simple.
Just click on ‘Photos’ in the left side bar of your Fan Page and then the ‘Upload More Photos’ box. Upload your images and you’ll be asked to name the album. The name of the album will appear with the photo in people’s News feeds and in the photo viewer so it’s a good idea to name the album something like ‘Your band – special fan offers’ or similar. Once you’ve done that you’ll have a chance to enter a description for each one.
This is the final step in making them each an effective ad. In the relevant description, write what marketers call a ‘call to action’ (basically something that asks the viewer to do something) and put a link to where you want them to go.
So, for us, on the image advertising our free eBook, we’ll say something like ‘Click here to get our free eBook full of tips and advice on how to make it in the music business’ followed by a link to the page on our site where you can sign up for that eBook.
For your band, you might have an image of a new single and in the description have something like ‘Click here to get our new album on iTunes’ with a link to iTunes. Better still, have a link to some free tracks in one image, an album for sale in another and latest gig tickets in another – all linking from the description to the relevant web page.
Publish all the images when you’re set and they should appear. When anyone clicks on any of them, they will expand to full size in the photo viewer and your relevant link will be underneath in the description.
It might well actually prove to be better to upload the images one at a time over a period of a few days. This is because every time that you upload a new image it’ll appear in all your fans’ News feeds, together with the description. Spreading them out will give you more visibility.
And, don’t worry if you want to change the description to point somewhere else as you can always change that later.
Even if you don’t want to go down this route and create images that’ll work like ads, at least use the strip to it’s fullest possibility – perhaps just with a well centred shot of each member of the band and the description linking off to their personal Twitter page.
Lastly, and not wishing to repeat ourselves, only 5 images will show at any one time, but you can have as many as you like set to show in the photo strip. Just remember that Facebook will randomly display them so you want them to look good in any combination and to be consistent with the overall look and design of your Fan Page.


0 comments:
Post a Comment